In this article, you will learn how to adjust your plastic frames at home when they are too loose, too tight or sit crooked in your face. In this article are a few tutorial style videos embedded to make it easier for you to follow the instructions.
How To Adjust Your Plastic Frame if It Is Too Loose?
First of all, you always start in the middle of the frame. Look at the bridge. The bridge combines two parts of the frames in which the lenses are mounted. This usually makes up for a slight angle of 5°. If you look at the bridge and you want to tighten it there you need to warm up your frame a little. Therefore you should prepare warm water or even better a hairdryer.
Before we get into the specific tips on what to do I recommend you remove the lenses from the frame before you warm it up. The reason is the coating of your lenses could be damaged if the lens gets heated up as well. I have an article here for you on how to remove the lenses and here another one on how to install the lenses back into the frame.
- Take your hairdryer and warm the bridge of your frame from every angle.
- As you warm the frame of your glasses try to bend it a little to feel when the material is ready. You will feel it when it feels less stiff.
- Then place your thumbs in the middle of the bridge where your nose sits. place the rest of your fingers no the front of the frame and apply a little pressure.
- Make sure both sides of the lenses adjacent to the bridge are still parallel.
I recommend to cool them down a little with cold water before you try them on. If they are still too loose just repeat the process.
How To Tighten Glasses Arms?
If the temples are too wide on your plastic frame you also need to warm the frame before you can bend the temples more towards your head. Oftentimes an angle of 90° is referenced for an optimal fit. However, in your individual situation, this can be different. So let us say we just want to tighten your glasses arms.
- Take your hair dryer and warm the area were the middle part of the frame meets the arms.
- Rotate and flip your lenses so warmth is distributed evenly on this part of the frame.
- Place your index finger on the side of the frame where your face sits and your thumb on the other side right BEFORE the arm begins and the other on also on the middle part of the frame. (Watch the video to make this step right)
- The other thumb should be placed more toward the middle of ht frame.
- Now press a little against the middle part right before arm begins.
After you performed the steps on one site of the frame make sure you do the same on the other site so your glasses sit even in your face.
How To Adjust a Plastic Frame When One Side Sits Higher Than the Other?
In order to adjust the part correctly, that is causing your glasses to sit higher on one side than the other first you need to identify the part that is causing it. This could be:
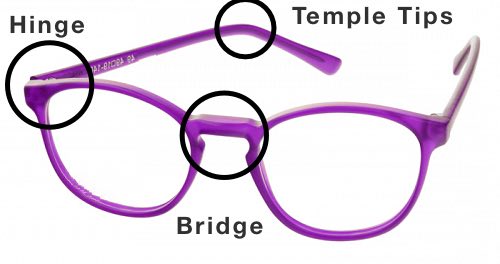
- The bridge (the middle of the frame)
- The hinges
- The temple tips
Check the bridge
Place your glasses on a table in front of you. Now look at it from above. Do the lenses stand in the same angle? If yes, continue by checking the other steps. If not you need to warm up the frame again and twist the frame so the lenses sit in the same angle again.
Check the hinges
Usually, when the arms are not folded of your glasses they should align perfectly on the part where they touch the middle of your frame. However if a gap is formed between your frame and the arms (temples) check the other side for symmetry. If you can see a bigger gap on one side compared to the other close the gap on the side where it is more open.
Produce a symmetrical gap or close the gap completely by pulling the temple into the desired position. Watch the video closely for this task.
If you have a symmetrical adjusted frame on the bridge and on the hinges the end of the temples could be misaligned. You can warm up too with your hair dryer and adjust them as you need. In most cases the temples on the end touching your ear. However some of them are fairly straight and do not touch you behind the ears.
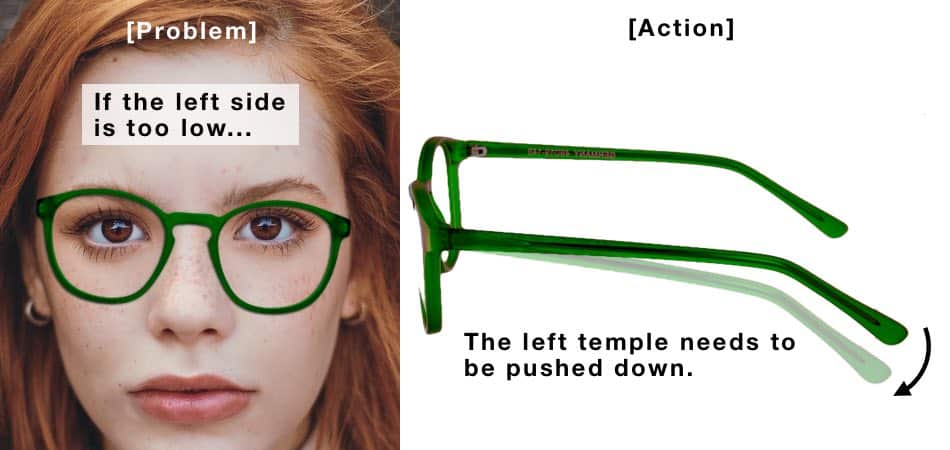
If everything is symmetrical on the frame and the frame is still crooked in your face we need to readjust the hinges so it sits optimally in your face. Take your plastic frame take it on. Look at you now in the mirror. On the side where the plastic frame sits higher the arm of the frame needs to bend down on the hinge.
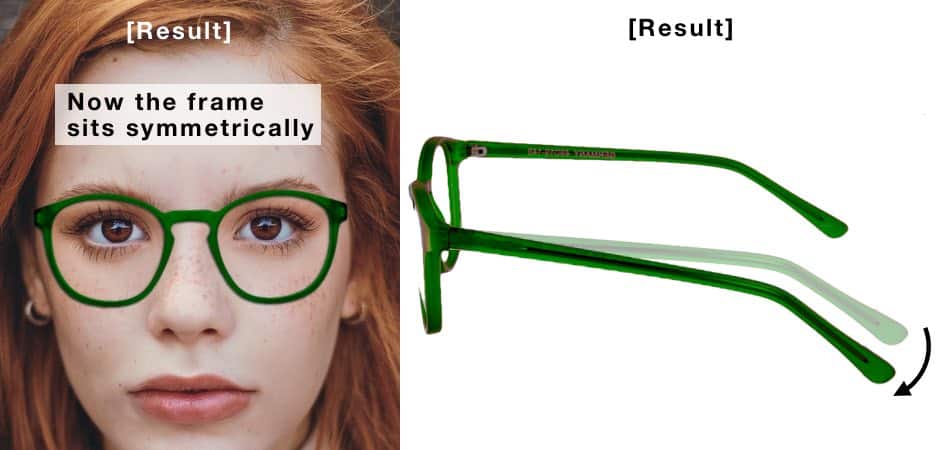
When the side is too high just grab the arm on this side and bend it up. Perform these adjustments until the plastic frame is adjusted optimally.
Check the Temple Tips
The last part that could need some adjustment of your plastic frame could be the temple tips. Usually, the end of your temple/arm rests on your ear. From the beginning of the temple to the part of your ear a straight line is formed by the temple. But in some cases, you can see when the temple was bent too early.
In such a case you can see the curve that actually should be hidden under your ear. When this happens the temple tips of your plastic frame need to be bent in a less excessive way or the bending needs to happen a few millimeters behind the position where it can be found now.
You can bend the temple tips after you warmed them with a hairdryer. Position your thumbs left and right from the position you want to change the shape of the temple. The rest of the fingers will be positioned on the other side to hold against the pressure of your thumbs. Then apply pressure until you see the desired change in shape.
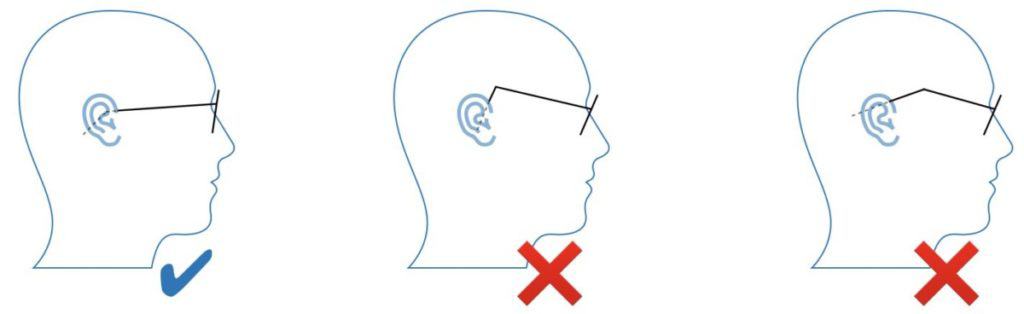
The bearing of the temple on your ear should be evenly distributed. If it sits just on one point behind your ear it will be quite uncomfortable in most cases.
In my opinion as an optician it is best to get your plastic frame adjusted by a professional. He checks the frame and has an eye for details most have not. However in some cases it is just great to have an tutorial to get something adjusted.
I wish you a great day.